WundaTrade
22L Wunda Rapid Bond Spray
22L Wunda Rapid Bond Spray
Couldn't load pickup availability
22ltr Disposable Cannister -High Performance, fast drying formula.
Wunda Rapid Bond Spray formulated specifically to bond Wunda EPS Overfloor Boards to concrete, screed & wooden floors with excellent high coverage of up to 150sqm*.
Using a 22ltr disposable canister & re-usable spray lance will speed up laying time and make for an easier installation on larger jobs – with a 2 year shelf-life.
Available as:
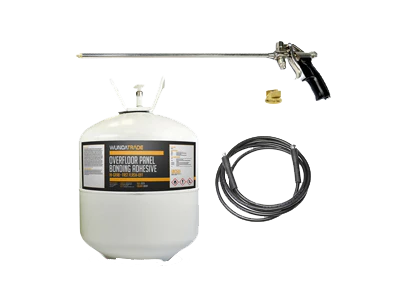
22L Wunda Rapid Bond Spray Kit - contains a 22ltr disposable cannister and a re-useable spray lance with hose.
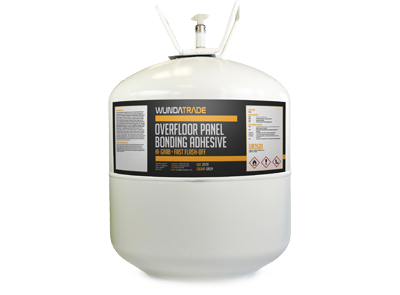
22L Wunda Rapid Bond Cannister Only - a 22ltr disposable cannister only.
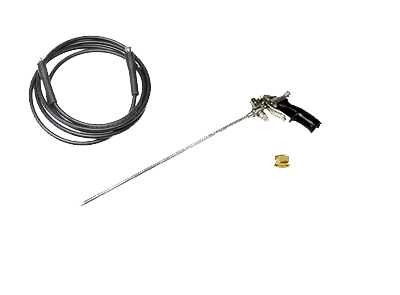
Wunda Re-usable Spray Gun & Hose Only - a re-useable spray lance with hose only.
Please call in for shipping options
CANISTERS ORDERED BEFORE 3PM WILL ARRIVE WITHIN 48HRS. CANISTERS ORDERED AFTER 3PM WILL ARRIVE WITHIN 72HRS.
Share


Product Information
Download Factsheet T07 - WUNDA BOARD SPRAY ADHESIVE from our Support page.
22 ltr Canister & Long wand spray gun user guide.*Up-to 150sqm coverage - single coat application.
DO NOT TURN THE CANISTER VALVE OFF UNTIL THE CANISTER IS EMPTY AND YOU ARE READY TO REPLACE THE CANISTER WITH A NEW ONE.
(this is to prevent adhesive curing in the hose and gun).
On initial use, or if canister has been standing for over 12 hrs, the
hose and gun may require a purge. Pull the trigger and adjust flow by turning
adjustment screw at the back of the gun (anticlockwise to open and clockwise to
close). Dispense and discard adhesive until a consistent spray pattern is
achieved. For optimum results store canister above 18° keep canister off cold
concrete floors during use. Keeping the canister in the cardboard shipping box
will provide storage for the hose and gun between uses. If adhesive is expelled
wet or as a jet, canister is too cold – move to a warm environment and allow to
thoroughly acclimatize before re-using. Wunda Overfloor panel adhesive is a web
spray suitable for bonding EPS Overfloor boards directly onto suitably prepared
concrete/screed and wooden floors. When connected, keep valve open and hose
pressurised at all times – between uses this will prevent the adhesive from
drying in the hose and gun.
DO NOT close canister
valve until ready to connect to a new pressurised canister. Use only in well-ventilated
areas.
DO NOT thin or
reactivate with solvents.
DO NOT incinerate.
DO NOT expose to
extreme heat over 50° Keep away from sources of ignition.
Release pressure in hose/gun before disconnecting hose from canister.
Test for suitability before use. Avoid exposure to direct sunlight. Make sure
that substrate is dry, clean, and free from dust, dirt, oil loose paint, wax,
grease or any other substance that will prevent adhesion. Secure and or replace
any loose floor boards, fill/level any imperfections in the substrate. We
recommend shaking the canister well before use.
1, Attach and secure the hose onto the spray gun screw the larger nut to
the gun thread (clockwise) and fully tighten with a spanner, check hose is
securely attached. Check and tighten the spray tip this will give the correct
spray distribution pattern.
2, Attach the opposite end of the hose onto the canister valve. Screw
the smaller hose nut to the canister valve (clockwise) and fully tighten with a
spanner. Check the hose is securely attached re-check and tighten all
connections.
3, Turn the canister valve anti-clockwise until fully open. Check
connections for leaks - if any occur, tighten connections. DO NOT TURN THE
CANISTER VALVE OFF UNTIL THE CANISTER IS EMPTY AND YOU ARE READY TO REPLACE THE
CANISTER WITH A NEW ONE (this is to prevent adhesive curing in the hose and
gun).
On initial use, or if canister has been standing for over 12 hrs, the
hose and gun may require a purge. Pull the trigger and adjust flow by turning
adjustment screw at the back of the gun (anticlockwise to open and clockwise to
close). Dispense and discard adhesive until a consistent spray pattern is
achieved.
4, Open the spray control knob on the back of the gun, open 2-3 full
turns from shut and perform a test spray. The spray should form an even web
pattern when held 10-20cm (4”-8”) away from the substrate.
The easiest visual comparison that can be made to the correct spray
pattern is that of a spiders web!. Opening the spray control knob will widen
the spray pattern, closing the control knob will narrow the spray pattern.
5, Hold the gun at 90° angle to the surface, applying a uniform, even
coat of adhesive to obtain 80%-100% coverage on the surface. If necessary,
spray another coat in areas that appear to need more adhesive, some floor types
may require a coat of adhesive to both the substrate and the underside of the
Overfloor board. When applying to both surfaces apply one coat horizontally and
the other coat vertically.
6, Allow adhesive to tack-off test for dryness using back of hand only;
surface should be tacky but adhesive should not transfer to skin.
Position the Overfloor board onto the adhesive, checking orientation
before laying. Apply downward pressure onto the Overfloor board and smooth over
ensuring a good bond between substrate and Overfloor board. Note; repositioning
is not possible after contact has been made.
7, If the spray tip clogs, unscrew the spray tip from the gun lance and
clean with a solvent such as lacquer thinner or acetone. DO NOT use a pin on
the spray tip opening. 8, DO NOT turn off the valve on canister until ready to
change canister (leaving the hose pressurised will prevent the adhesive from
curing inside the hose)
In between use leave the spray canister valve
OPEN with hose/gun attached, close the spray control knob on the
gun. DO NOT disconnect the hose/gun from the canister until ready to swap
canister for a new full one.
CANISTER CHANGE OVER
IMPORTANT: SAFETY GLASSES
AND GLOVES
MUST BE PUT ON BEFORE STARTING THE CHANGE OVER PROCESS We recommend shaking the
new canister well before use. If you are not transferring the hose and gun to a
new canister you will need to clean it to ensure it can be used again on future
jobs.
1, Turn
the canister valve clockwise until fully closed. Pull the trigger on the gun
and hold for 10 seconds to expel residual pressure.
2, Unscrew the hose nut and disconnect the hose from the empty canister
(move to next page for canister disposal).
3, Connect the hose and gun to the new canister, screw the hose nut to
the canister (clockwise) with a spanner. Check the hose is securely attached.
Check and tighten ALL connections turn the canister valve anti-clockwise until
fully open and check all connections for any leaks – if any occur, tighten
connections. Test spray a small amount of adhesive to check for pressure.
IMPORTANT NOTE:THIS PROCESS
SHOULD BE FOLLOWED THROUGH IMMEDIATELY AND ADHESIVE SHOULD BE DISPENSED FROM
THE NEW CAN OR THE GUN AND HOSE WILL BLOCK AND BECOME UNUSABLE.
CANISTER DISPOSAL
IMPORTANT:SAFETY GLASSES
AND GLOVES MUST BE PUT ON BEFORE STARTING THE DISPOSAL PROCESS
1, Lay the empty canister on its side with the valve pointing AWAY from
the operator, and well away from sources of ignition.
Open the canister valve (anti-clockwise) and release any residual pressure.
Allow the canister to remain on its side whilst pressure is released, laying
the canister on its side will ensure no residue of adhesive is expelled – just
propellant.
2, Stand canister upright. Use a hammer and brass punch or other
non-sparking instrument to puncture the friable disc.
3, As long as the user is able to accept responsibility for
de-pressurising the canister, it can be disposed of as per your normal scrap
metal disposal (subject to local waste restrictions).
TRANSPORT INFORMATION
During transport, the recommended PPE, First Aid Kit and suitable Fire
Extinguisher should be readily accessible in the vehicle.
Keep vehicle well ventilated at all times whilst it contains spray
contact adhesive. Secure canister during transportation.
